
Hoover FH50150 Manual: A Comprehensive Guide
Today, on February 9th, 2026, at 9:13:24 PM, welcome to this detailed manual designed for your new Hoover FH50150. This guide will expertly unlock all its features!
Congratulations on selecting the Hoover FH50150 carpet cleaner! This powerful and versatile machine is designed to revitalize your carpets and upholstery, leaving them fresh and clean. This introduction serves as your starting point for understanding the capabilities of your new appliance. The FH50150 combines effective cleaning technology with user-friendly operation, making it a valuable addition to any home.
This manual provides a comprehensive overview, covering everything from initial setup and operation to maintenance and troubleshooting. We’ll guide you through each step, ensuring you achieve optimal cleaning results. Understanding the features and following the instructions carefully will maximize the lifespan and performance of your Hoover FH50150. Prepare to experience a deeper, more thorough clean with this innovative cleaning solution!
Key Features and Specifications
The Hoover FH50150 boasts several key features designed for superior cleaning performance. It includes HeatForce™ Technology for consistently warm water, enhancing stain removal. The SpinScrub® Brush Technology features counter-rotating brushes that surround rugs and carpets for a thorough clean. Dual Tank Technology keeps clean and dirty water separate, preventing re-soiling.
Specifications include a 12-amp motor, a generous 1-gallon tank capacity for both clean and dirty water, and a 8-foot hose for reaching difficult areas. The unit weighs approximately 17 pounds. It’s designed for use on carpets, rugs, and upholstery. The quick clean tool allows for spot cleaning, and adjustable settings cater to various cleaning needs. Expect powerful suction and effective stain lifting with this robust machine.

Setting Up Your Hoover FH50150
Prepare for effective cleaning! This section guides you through unboxing, assembly, and properly filling the water tanks for optimal performance and usability.
Unboxing and Component Identification
Carefully unpack your Hoover FH50150 and verify all components are present. You should find the main unit, a power cord, a clean water tank, a dirty water tank, a Quick Clean tool, and potentially sample cleaning solution.
Inspect each part for any shipping damage before proceeding. The main unit houses the motor, brushroll, and suction components. The clean water tank is typically translucent, allowing you to monitor the solution level. The dirty water tank is designed to collect the extracted grime.
The Quick Clean tool is ideal for spot cleaning and upholstery. Refer to the parts diagram in this manual to visually confirm each component. If anything is missing or damaged, contact Hoover customer support immediately for assistance; Proper identification ensures a smooth setup process.
Assembling the Hoover FH50150
Assembly is straightforward, requiring minimal effort. First, securely attach the clean water tank to the designated slot on the unit – you should hear a click confirming it’s locked in place. Next, ensure the dirty water tank is properly inserted; it also features a locking mechanism.
The handle typically snaps into the main unit, providing a comfortable grip during operation. Verify it’s firmly secured before use. If your model includes additional attachments, like the Quick Clean tool, connect them to the hose port as needed.
Double-check all connections to prevent leaks or malfunctions during cleaning. A properly assembled unit ensures optimal performance and safety. Refer to the included diagrams for visual guidance if needed. Avoid forcing any parts; gentle pressure is sufficient.
Filling the Clean and Dirty Water Tanks
Proper tank management is crucial for effective cleaning. The clean water tank accepts warm tap water and Hoover’s cleaning solution – never use hot water or excessive soap. Fill to the ‘Max’ line indicated inside the tank, avoiding overfilling.
The dirty water tank remains empty initially. This tank collects the soiled water removed during cleaning. After each use, or when the ‘Full’ indicator illuminates, it requires emptying.
Always remove both tanks before moving the machine or performing maintenance. Ensure the caps are securely tightened after filling or emptying to prevent spills. Using the correct cleaning solution is vital for performance and to protect your machine.

Operating Instructions
Now that setup is complete, you’re ready to begin cleaning! This section details powering the unit, selecting appropriate modes, and utilizing the quick clean tool effectively.
Powering On and Off
Initiating operation with your Hoover FH50150 is straightforward. First, ensure the clean water tank is adequately filled and securely positioned. Then, locate the power button, typically situated on the handle or main body of the machine – it’s often clearly marked with a universal power symbol.
Press the power button firmly to activate the device; a subtle click or indicator light will confirm successful activation. To power down, simply press the same button again.
Always ensure the machine is fully powered off before performing any maintenance, changing attachments, or leaving it unattended. Avoid abruptly disconnecting the power cord while the unit is running, as this could potentially damage internal components. A complete power cycle is recommended for optimal performance and longevity of your Hoover FH50150.
Selecting Cleaning Modes
The Hoover FH50150 offers versatile cleaning modes to tackle diverse surfaces and messes. Typically, a mode selector dial or buttons allow you to choose between options like ‘Quick Wash’, ‘Deep Clean’, and ‘Rinse’. ‘Quick Wash’ is ideal for light, everyday spills and surface cleaning, providing a faster drying time.
‘Deep Clean’ utilizes a more intensive cleaning action, employing heated water and extended brush agitation for stubborn stains and heavily soiled areas. The ‘Rinse’ mode is crucial for removing any remaining cleaning solution after deep cleaning, ensuring residue-free surfaces.
Refer to the control panel for specific mode indicators and recommended usage scenarios. Selecting the appropriate mode optimizes cleaning performance and protects your floors. Experiment to find the best setting for your specific needs!
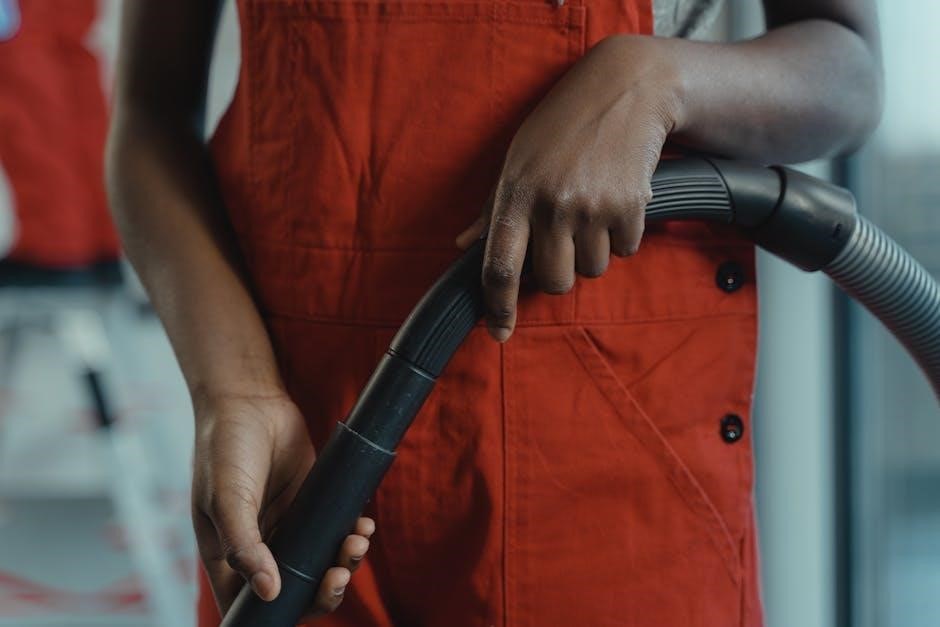
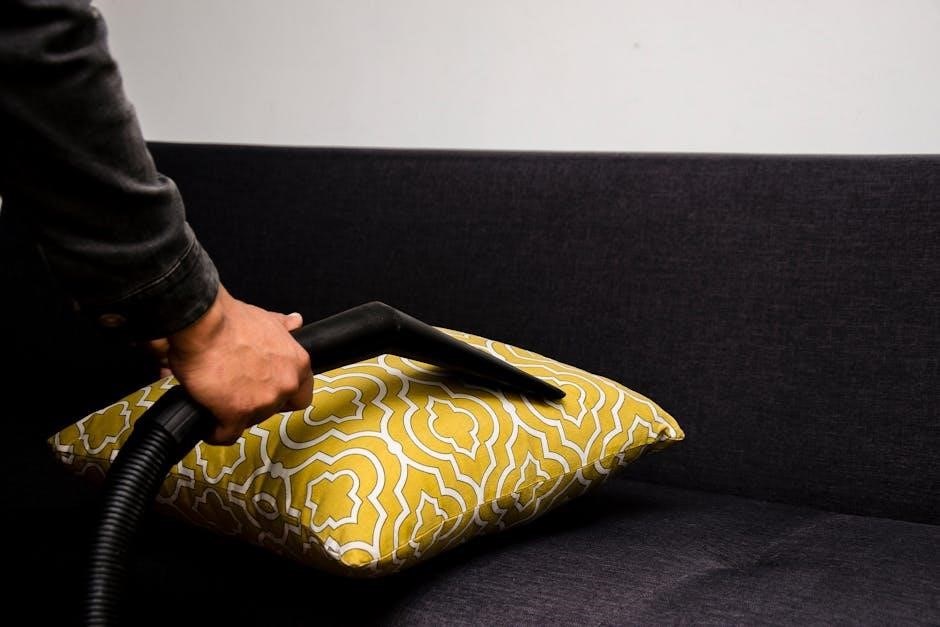
Using the Quick Clean Tool
The Hoover FH50150’s Quick Clean tool is designed for tackling spots, stains, and hard-to-reach areas with precision. This handheld attachment typically connects directly to the machine’s hose, providing targeted cleaning power. It’s perfect for upholstery, stairs, and pet messes.
To use, select your desired cleaning mode – often ‘Quick Wash’ is sufficient for spot treatments. Apply a small amount of cleaning solution directly to the stain, if needed. Gently glide the Quick Clean tool over the affected area, utilizing the trigger to dispense cleaning solution and suction up the dirty water.

Avoid over-saturating the surface. Multiple passes may be necessary for stubborn stains. Remember to rinse the tool after each use to prevent clogging and maintain optimal performance.

Maintenance and Care
Regular upkeep ensures peak performance and extends the life of your Hoover FH50150. Consistent cleaning of components is vitally important for optimal results.
Cleaning the Brushroll
Maintaining a clean brushroll is crucial for effective carpet and floor cleaning with your Hoover FH50150. Over time, hair, fibers, and debris can become tangled around the brushroll, reducing its cleaning ability and potentially damaging the motor. To access the brushroll, first, ensure the machine is powered off and unplugged for safety.
Typically, there’s a release mechanism or cover plate on the bottom of the unit. Remove this to expose the brushroll. Gently lift the brushroll out of its housing. Use scissors or a seam ripper to carefully cut away any tangled hair, string, or fibers. Avoid pulling forcefully, as this could damage the bristles.
Inspect the brushroll for any signs of wear and tear. If bristles are bent or broken, consider replacing the brushroll for optimal performance. Once clean, reinsert the brushroll into its housing, secure the cover plate, and you’re ready to continue cleaning!
Emptying and Cleaning the Tanks
Regularly emptying and cleaning both the clean and dirty water tanks is essential for maintaining the performance and hygiene of your Hoover FH50150. After each use, or when the dirty water tank is full, power off and unplug the machine. Remove both tanks – they usually have a simple release mechanism.
Carefully pour the dirty water into a suitable drain, avoiding splashing. Rinse the dirty water tank thoroughly with warm water, removing any sediment or debris. For the clean water tank, empty any remaining solution and rinse it as well. Inspect both tanks for any buildup or discoloration.
Periodically, use a mild detergent to clean the tanks more thoroughly. Ensure all soap residue is rinsed away before reattaching. Clean tanks prevent odors and ensure optimal cleaning solution effectiveness.
Filter Maintenance and Replacement
Maintaining a clean filter is crucial for the suction power and overall performance of your Hoover FH50150. The filter traps dirt and debris, preventing them from recirculating onto your floors. Locate the filter compartment – consult your diagrams for its exact position.
After each use, or at least monthly, remove the filter and rinse it thoroughly under cool water. Gently tap it to remove excess debris; avoid using harsh chemicals or abrasive cleaners. Allow the filter to air dry completely before reinstalling it – a damp filter can damage the machine.
Filters have a limited lifespan. Inspect your filter regularly for tears or damage. Replace the filter every 6-12 months, or sooner if you notice a decrease in suction or a musty odor. A new filter ensures optimal cleaning performance.
Troubleshooting Common Issues
Encountering problems? This section provides solutions for typical issues like power failures, suction loss, and brushroll malfunctions with your Hoover FH50150.
Hoover FH50150 Not Powering On
If your Hoover FH50150 fails to power on, begin with the simplest checks. Ensure the machine is securely plugged into a functioning electrical outlet – test the outlet with another device to confirm. Next, verify the power switch is fully engaged; sometimes a partial press won’t activate the unit.
Inspect the power cord for any visible damage, such as cuts or fraying. A damaged cord presents a safety hazard and requires immediate replacement. Also, check the circuit breaker or fuse box to ensure the circuit hasn’t tripped or the fuse hasn’t blown. Reset the breaker or replace the fuse if necessary.
If these steps don’t resolve the issue, there might be an internal problem requiring professional service. Do not attempt to disassemble the unit yourself, as this could void the warranty and pose a risk of electrical shock. Contact Hoover customer support for assistance.
Loss of Suction
Experiencing a loss of suction with your Hoover FH50150? The most common cause is a full or clogged dirty water tank. Immediately stop operation and empty the tank, ensuring all debris is removed. A partially filled tank can also restrict airflow, so complete emptying is crucial.
Next, inspect the brushroll for tangled hair, strings, or other obstructions. These can significantly reduce suction power. Remove any debris wrapped around the brushroll. Also, check the hose and attachments for blockages; disconnect them and visually inspect for obstructions.
Finally, verify the filters are clean. Clogged filters severely limit airflow. Rinse or replace the filters as needed, following the maintenance instructions in this manual. Consistent filter maintenance is vital for optimal suction performance.
Brushroll Not Rotating
If your Hoover FH50150’s brushroll isn’t rotating, first ensure the machine is powered on and set to a cleaning mode that activates the brushroll. Verify there’s no significant obstruction tangled around the brushroll itself – hair, string, or carpet fibers are common culprits. Carefully remove any debris.
Next, inspect the brushroll motor area for any visible damage or blockages. A jammed or broken component could prevent rotation. If no visible issues are found, check the drive belt connecting the motor to the brushroll; a broken or slipped belt will halt operation.
If the belt is intact, a motor issue may be present. Contact Hoover customer support for assistance. Do not attempt to repair the motor yourself, as this could void your warranty and pose a safety risk.
Safety Precautions
Always unplug the Hoover FH50150 before maintenance. Avoid using outdoors or on wet surfaces, and never operate with a damaged cord to prevent hazards.
General Safety Guidelines

Before using your Hoover FH50150, carefully read all instructions within this manual to ensure safe and effective operation. This appliance is designed for indoor household use only; avoid any commercial or outdoor applications. Always supervise children when the machine is in use, preventing them from playing with it.

Never operate the unit with a damaged cord or plug. If the power cord is damaged, it must be replaced by the manufacturer or a qualified technician to avoid electrical shock. Do not immerse the machine in water or any other liquid. Ensure the machine is properly grounded.
Avoid picking up flammable or combustible liquids with this device. Do not use it to clean areas containing explosive dust. Always disconnect the appliance from the power outlet before performing any maintenance, cleaning, or changing accessories. Use only manufacturer-approved attachments and accessories.
Electrical Safety
To prevent electrical hazards when operating your Hoover FH50150, always ensure the voltage indicated on the appliance matches your household supply. Never use an extension cord unless absolutely necessary, and if used, ensure it’s appropriately rated for the machine’s power consumption. Avoid operating the appliance with wet hands or in damp environments.
Do not pull or carry the appliance by the power cord. Keep the cord away from heated surfaces, sharp edges, and moving parts. If the power cord is damaged, immediately discontinue use and contact authorized service personnel for replacement. Never attempt to repair the cord yourself.
Always unplug the Hoover FH50150 from the electrical outlet before performing any maintenance, cleaning, or changing accessories. Ensure the outlet is properly grounded. Avoid using the appliance near water sources. Regularly inspect the power cord for any signs of damage.

Warranty Information
Your Hoover FH50150 is protected by a limited warranty against defects in materials and workmanship, commencing from the original date of purchase. The standard warranty period is one year for parts and labor. However, this may vary depending on your region and retailer; please retain your proof of purchase for verification.
This warranty covers normal residential use. Damage resulting from commercial use, misuse, abuse, accidents, alterations, or lack of proper maintenance is not covered. The warranty does not extend to consumable parts like filters and brushrolls;
To obtain warranty service, contact Hoover customer support with your model number and date of purchase. Authorized service centers will diagnose and repair or replace defective parts, at Hoover’s discretion. Shipping costs to and from the service center are the responsibility of the consumer. See full warranty details online at Hoover’s official website.